Wiki
This is not a product page, but a FAQ page
No.1 SSH connection failed with No supported authentication methods available (server sent: publickey,gssapi-keyex,gssapi-with-mic)
Step 1: Make sure network can access and ssh port 22 are open.
you can use ssh -v -p 22 "your instance ip" to check the ssh port is open.
Step 2: Check your connection account is correct, and ssh tools is supoort SHA256 or 512.Because after Centos 9, the server can not accecpt SHA1 signature algorithm. If you do not want to update your ssh tools, you can choose ed25519 key type.
 Or you can choose to make the system support SHA1,We do not recommend this due to security risks.
 CentOS/Rocky/Rhel command: update-crypto-policies --set LEGACY
No.2 How to expand storage size
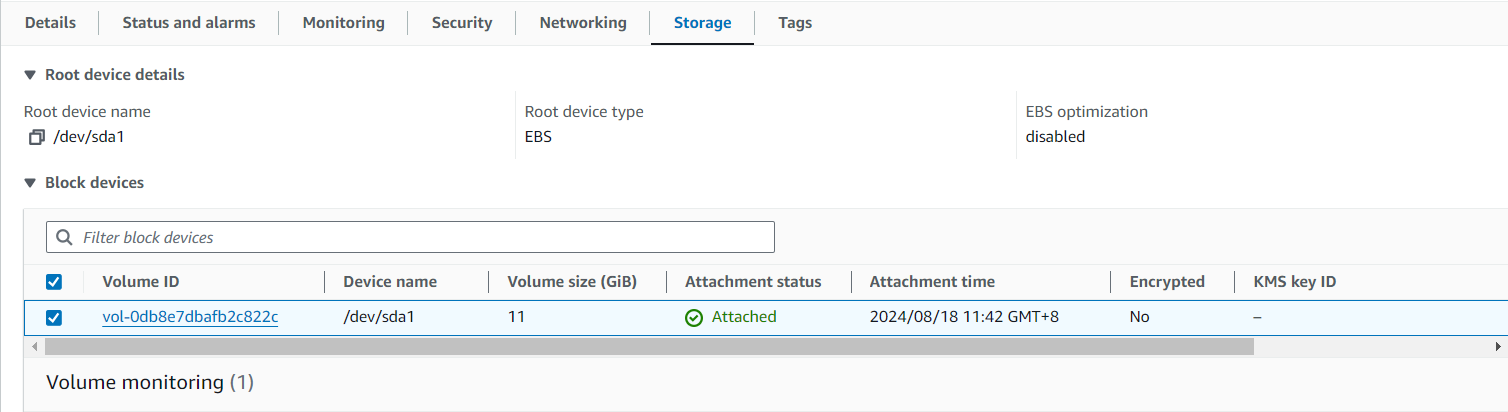
Step 1: Resizing EBS Volumes
On the instance page, switch to the storage option and select the volume ID you want to expand.
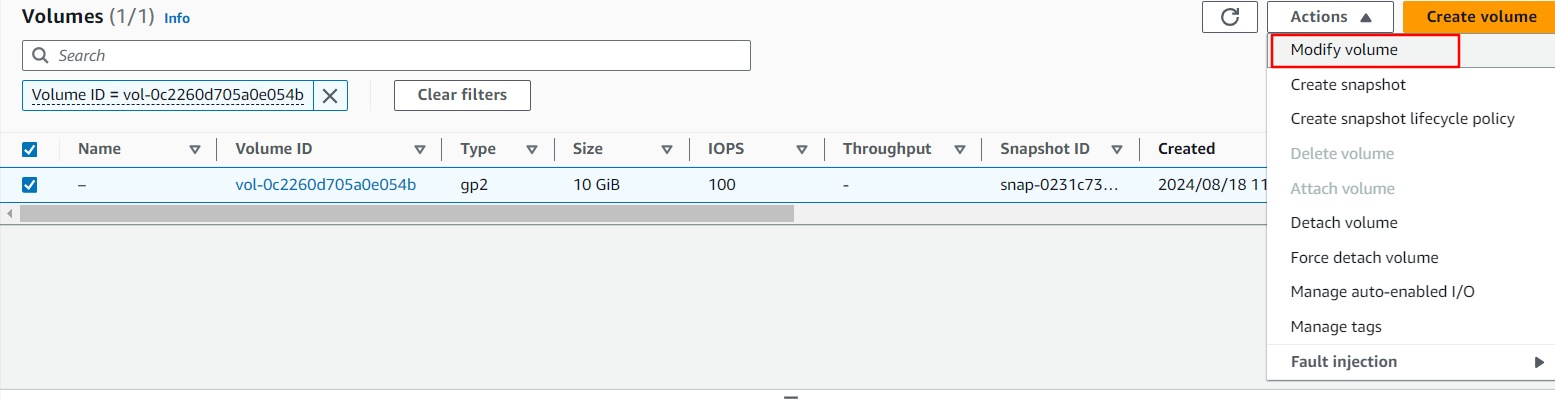
Check the volumes that need to be expanded, and then click Actions — Modify volume
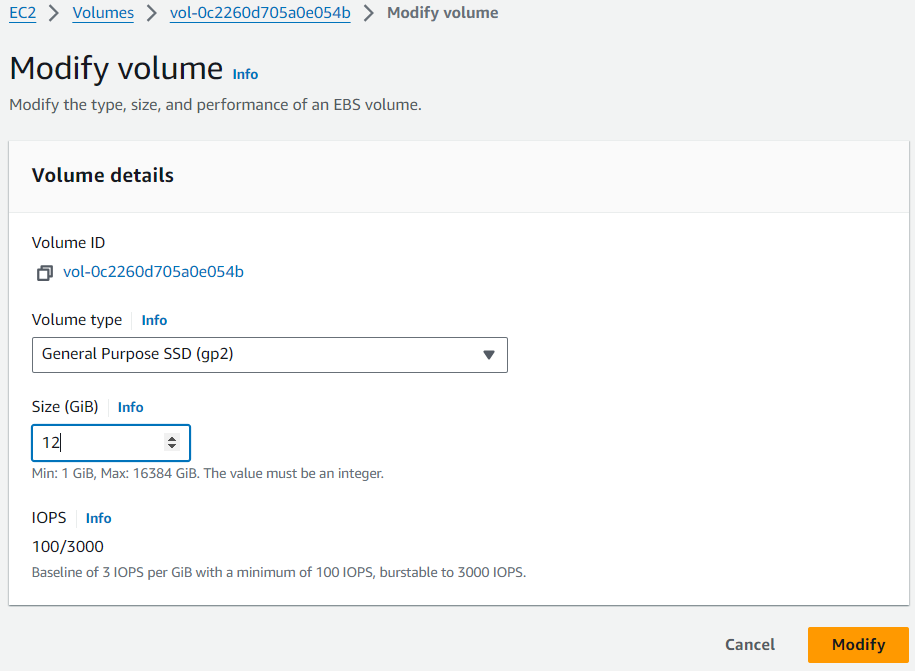
Enter the target storage size and click the Modify button
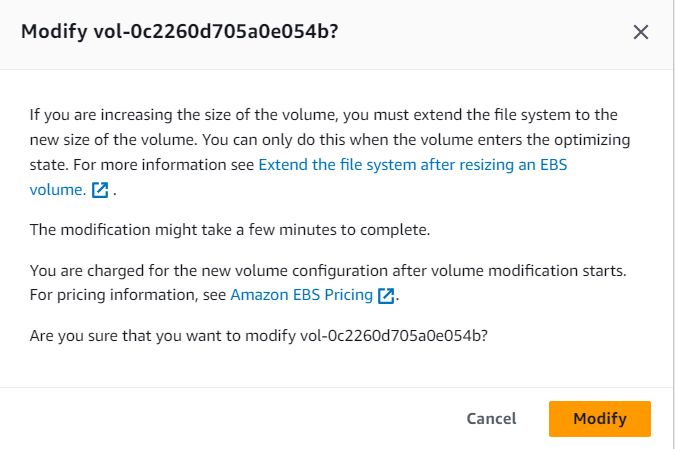
Applying change with click Modify
Step 2: Linux File System Expansion
a.Standard partition environment
 [root@ip-172-31-60-182 ~]# df -Th
 Filesystem     Type      Size  Used Avail Use% Mounted on
 devtmpfs       devtmpfs  4.0M     0  4.0M   0% /dev
 tmpfs          tmpfs     383M     0  383M   0% /dev/shm
 tmpfs          tmpfs     153M  3.0M  150M   2% /run
 /dev/xvda2     xfs        10G  1.7G  8.4G  17% /
 tmpfs          tmpfs      77M     0   77M   0% /run/user/1000

 [root@ip-172-31-60-182 ~]# lsblk
 NAME    MAJ:MIN RM SIZE RO TYPE MOUNTPOINTS
 xvda    202:0    0  12G  0 disk
 ├─xvda1 202:1    0   1M  0 part
 └─xvda2 202:2    0  10G  0 part /

 [root@ip-172-31-60-182 ~]# growpart /dev/xvda 2
 CHANGED: partition=2 start=4096 old: size=20967391 end=20971486 new: size=25161695 end=25165790

 ##for xfs Filesystem ,if your Filesystem is ext4 ,you can use "resize2fs /dev/xvda2"
 [root@ip-172-31-60-182 ~]# xfs_growfs /
 meta-data=/dev/xvda2             isize=512    agcount=6, agsize=524096 blks
          =                       sectsz=512   attr=2, projid32bit=1
          =                       crc=1        finobt=1, sparse=1, rmapbt=0
          =                       reflink=1    bigtime=1 inobtcount=1 nrext64=0
 data     =                       bsize=4096   blocks=2620923, imaxpct=25
          =                       sunit=0      swidth=0 blks
 naming   =version 2              bsize=4096   ascii-ci=0, ftype=1
 log      =internal log           bsize=4096   blocks=16384, version=2
          =                       sectsz=512   sunit=0 blks, lazy-count=1
 realtime =none                   extsz=4096   blocks=0, rtextents=0
 data blocks changed from 2620923 to 3145211


 [root@ip-172-31-60-182 ~]# df -h
 Filesystem      Size  Used Avail Use% Mounted on
 devtmpfs        4.0M     0  4.0M   0% /dev
 tmpfs           383M     0  383M   0% /dev/shm
 tmpfs           153M  3.0M  150M   2% /run
 /dev/xvda2       12G  1.7G   11G  14% /
 tmpfs            77M     0   77M   0% /run/user/1000
No.3 Why is the CentOS/Rocky Linux AMI missing a part of its memory?
In RHEL 9 and later(X86), the memory allocation for kdump varies based on the total system memory.
  For systems with less than 4 GB of RAM: The default crash kernel memory allocation is typically 192 MB.
  For systems with 4 GB to 64 GB of RAM: The default crash kernel memory allocation is 256MB.
  For systems with more than 64 GB of RAM: The default crash kernel memory allocation is 512MB.
We do not recommend you to choose low memory instances when using AMIs such as centos stream / rocky linux 9,Because dnf-automatic will take a lot of memory.
No.4 Configure your CentOS 7 virtual machine to use vault repositories.
$ sudo yum-config-manager --disable \*
Add the following content at the end of the /etc/yum.repos.d/CentOS-Vault.repo file:
  $ sudo cat /etc/yum.repos.d/CentOS-Vault.repo

      [...]
      [base-vault]
      name=CentOS-$releasever - Base - Vault
      baseurl=http://vault.centos.org/centos/$releasever/os/$basearch/
      gpgcheck=1
      gpgkey=file:///etc/pki/rpm-gpg/RPM-GPG-KEY-CentOS-7
      enabled=1

      [updates-vault]
      name=CentOS-$releasever - Updates - Vault
      baseurl=http://vault.centos.org/centos/$releasever/updates/$basearch/
      gpgcheck=1
      gpgkey=file:///etc/pki/rpm-gpg/RPM-GPG-KEY-CentOS-7
      enabled=1

      [extras-vault]
      name=CentOS-$releasever - Extras - Vault
      baseurl=http://vault.centos.org/centos/$releasever/extras/$basearch/
      gpgcheck=1
      gpgkey=file:///etc/pki/rpm-gpg/RPM-GPG-KEY-CentOS-7
      enabled=1
Update the system to ensure everything is working correctly with the new repositories.
  $ sudo yum clean all
  $ sudo rm -rf /var/cache/yum/
  $ sudo yum makecache
No.5 Why can’t my low-memory instance type be accessed after running for a while on CentOS/Rocky Linux 9
  The issue is caused by dnf makecache, where frequent cache updates consume system memory.
  When using only the default repositories, dnf makecache can consume up to approximately 600MB of memory.
  You can either disable the dnf.makecache.timer or switch to an instance type with more memory.
  You can either disable the dnf.makecache.timer with the following command:
      sudo systemctl stop dnf-makecache.timer
      sudo systemctl disable dnf-makecache.timer